Mastering Stitch Drawing: Your Ultimate Guide To Bringing Lilo's Pal To Life
Few animated characters capture hearts quite like Stitch, the mischievous yet lovable alien from Disney's "Lilo & Stitch." His unique design, expressive features, and endearing personality make him a fantastic subject for artists of all skill levels. Today, we're learning how to draw Stitch from Lilo and Stitch, and you might be surprised at just how accessible it is to bring this iconic character to life on paper. Whether you're a seasoned artist looking for a fun new challenge or a complete beginner eager to try your hand at something creative, mastering Stitch drawing is a rewarding experience that promises both fun and artistic growth.
This comprehensive guide will walk you through everything you need to know, from gathering your basic supplies to understanding Stitch's unique anatomy and applying advanced techniques. We'll break down the process into simple, manageable steps, ensuring that by following along, you too can easily draw a perfect Stitch from Lilo and Stitch. So, take a break from those royal art works and try your hand at a neat drawing of Stitch, the lovable alien from Disney’s Lilo and Stitch.
Table of Contents
- Why Learn Stitch Drawing? The Endearing Appeal of Experiment 626
- Essential Supplies for Your Stitch Drawing Adventure
- Deconstructing Stitch: Understanding His Unique Anatomy for Drawing
- Step-by-Step Stitch Drawing: A Beginner-Friendly Approach
- Coloring Your Stitch Drawing: Bringing Experiment 626 to Life
- Beyond the Basics: Advanced Stitch Drawing Techniques & Ideas
- Resources for Aspiring Stitch Artists
- Common Pitfalls and How to Overcome Them in Stitch Drawing
Why Learn Stitch Drawing? The Endearing Appeal of Experiment 626
Stitch might be one of the cheekiest and most endearing characters in animation history, but drawing him can be much simpler than it seems. Created by Disney, Experiment 626, affectionately known as Stitch, embodies a fascinating blend of destructive chaos and profound loyalty. His wide eyes, large ears, and unique blue fur make him instantly recognizable and a joy to recreate on paper. Learning how to draw Stitch isn't just about replicating a character; it's about engaging with a beloved piece of pop culture and developing your artistic skills in a fun, low-pressure environment.
Beyond the sheer enjoyment, the act of drawing itself offers numerous benefits. It enhances fine motor skills, improves observation, and fosters creativity. For children, it's a fantastic way to engage with their favorite characters, and children will enjoy creating their own Stitch (from Lilo & Stitch). For adults, it can be a relaxing and meditative activity, a perfect break from daily routines. The process of breaking down a complex character into simple shapes and lines, as we will do with Stitch, builds confidence and provides a foundational understanding that can be applied to drawing other characters and objects.
Essential Supplies for Your Stitch Drawing Adventure
One of the best things about embarking on a Stitch drawing project is how few supplies you actually need. You likely already have most of them lying around your home or classroom. We hope you follow along with us, all you need is something to draw with, paper, and coloring supplies. This is a list of the supplies we used, but feel free to use whatever you have in your home or classroom:
- Drawing Utensil: A simple pencil (HB or 2B for sketching, B or 4B for darker lines) is perfect for initial outlines. For inking, a fine-tip marker like a Sharpie, a gel pen, or an inking brush pen will give your lines a clean, professional look.
- Paper: Any standard drawing paper will do. For coloring with markers, slightly thicker paper (like cardstock) can prevent bleed-through.
- Eraser: A good quality eraser (kneaded or vinyl) is essential for correcting mistakes and cleaning up your sketch lines.
- Coloring Supplies: This is where Stitch truly comes to life! Options include:
- Colored Pencils: Great for blending and subtle shading.
- Crayons: Ideal for younger artists, offering vibrant, easy-to-use color.
- Markers: Provide bold, intense colors.
- Watercolors: For a softer, more illustrative feel.
- Optional: A ruler for guidelines (though freehand is encouraged for organic shapes), a compass for perfect circles (though not strictly necessary for Stitch's slightly irregular head), and a light box if you plan to trace or transfer your sketch.
With these basic tools, you're well-equipped to begin your journey into the world of Stitch drawing.
Deconstructing Stitch: Understanding His Unique Anatomy for Drawing
Before diving into the steps, it's incredibly helpful to understand Stitch's core design principles. Through these steps, you will learn to use basic shapes and lines to structure Stitch’s body and convey his unique appearance. Stitch is a masterclass in appealing character design, relying heavily on simple, rounded forms and exaggerated features. His appeal lies in his balance of cuteness and mischievousness, which is reflected in his proportions.
When drawing any character, especially one as distinct as Stitch, focusing on making his shapes evenly balanced is crucial. If students focus on making his shapes evenly balanced, they are bound to end up with a really nice drawing of this popular movie character. This doesn't mean perfect symmetry, but rather a harmonious distribution of his features that makes him instantly recognizable.
The Foundation: Head and Facial Guidelines
The head is arguably the most important part of any character drawing, as it conveys personality and expression. For Stitch, his head is a defining feature. 1️⃣ Begin by drawing a large oval for Stitch’s head, making it slightly wider than tall. This oval will be the foundation for the rest of the drawing. The sides and bottom should have a round and soft curve to give his face a chubby and adorable appearance. This initial face outline for Stitch drawing sets the stage for accurate feature placement.
Once you have the basic oval, 2️⃣ add two guidelines (vertical and horizontal) crossing in the center of the oval to help place his facial features. The vertical line helps ensure his eyes, nose, and mouth are centered, while the horizontal line indicates the eye level. These guidelines are crucial for maintaining symmetry and getting his lovable expression just right. Remember, these are just light sketch lines that will be erased later.
Body Proportions and Dynamic Poses
Stitch's body is compact and muscular, yet still soft and rounded. His limbs are relatively short and thick, ending in small, clawed hands and feet. When structuring his body, think in terms of simple, connected shapes: a rounded rectangle or bean shape for his torso, and cylindrical forms for his arms and legs.
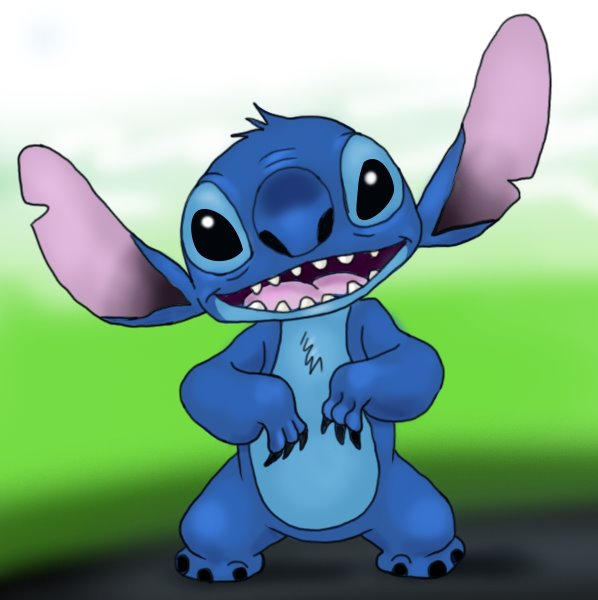
Stitch is also doing a hula dance like Lilo, so we shall start to draw his dancing body in this part of your Lilo and Stitch drawing. This implies that understanding dynamic poses is key to bringing him to life. His arms will be posed very similarly to Lilo’s, with the main details being that his arms are thicker and more rounded and he has small little hands with some claws at the end of them. When drawing the legs for Stitch according to the following steps, step 10, focus on their stubby yet powerful appearance, ensuring they can support his body in various stances. Pay attention to the joints – elbows, knees, and ankles – as they dictate the flow and flexibility of his pose.
Step-by-Step Stitch Drawing: A Beginner-Friendly Approach
Now, let’s learn how to draw Stitch from Lilo & Stitch step by step… how to draw Stitch step by step step 1. Learning how to draw a great looking Stitch from Lilo and Stitch with easy drawing instructions and video tutorial is simpler than you think. This tutorial video will show you how to draw Stitch Disney, and it's perfect for beginners since the steps are super easy to follow. Here is a step by step drawing with easy instructions to make the job simpler. Included are 9 easy steps to follow, designed to guide you from a basic sketch to a detailed character.
The general process involves:
- Sketching Basic Shapes: Start with the foundational ovals and circles.
- Connecting Shapes and Refining Outline: Join the basic forms to create the overall body and head shape.
- Adding Major Features: Place eyes, nose, mouth, ears.
- Adding Details: Include fur texture, claws, and expressions.
- Inking: Go over your pencil lines with a permanent marker or pen.
- Erasing Sketch Lines: Clean up your drawing.
- Coloring: Bring Stitch to life with his signature blue and pink hues.
From Basic Shapes to Recognizable Features
Once your initial head oval and guidelines are in place, the magic begins. You'll use these simple forms to build out Stitch's iconic features. His eyes are large and expressive, positioned on either side of the vertical guideline, with the horizontal line indicating their center. His nose is a rounded triangle, sitting just below the horizontal line, and his mouth is a wide, often mischievous curve. Remember his prominent, bat-like ears, which are large and pointed, extending outwards from the sides of his head. These features, though simple in their base shapes, are what give Stitch his unique character.
As you move to the body, think about the flow. Connect the head to the torso with a short, thick neck. Then, attach the limbs, ensuring they convey the pose you're aiming for. Whether he's sitting in a nice, symmetrical fashion or doing a hula dance, the underlying shapes provide the structure. Gradually refine these shapes, turning the initial ovals into the smooth curves of his head, the cylinders into his arms and legs, and the triangles into his ears.
Adding Personality: Details and Expressions
The details are what truly make your Stitch drawing come alive. Draw more small details for the Stitch step 11. These include his small antennae on his head, the tufts of fur on his chest and head, and the distinctive patterns on his back and ears. Don't forget his sharp claws on his hands and feet, which add to his alien yet endearing appearance.
Expressions are key to capturing Stitch's personality. He's known for his wide, mischievous grins, his curious wide-eyed stares, or even a grumpy pout. Consider how to draw Stitch holding a heart, which instantly conveys his softer, more loving side. Slight adjustments to the eyebrows, the curve of the mouth, or the angle of the eyes can dramatically change his mood. Practice different expressions to truly capture the range of this beloved character.
Coloring Your Stitch Drawing: Bringing Experiment 626 to Life
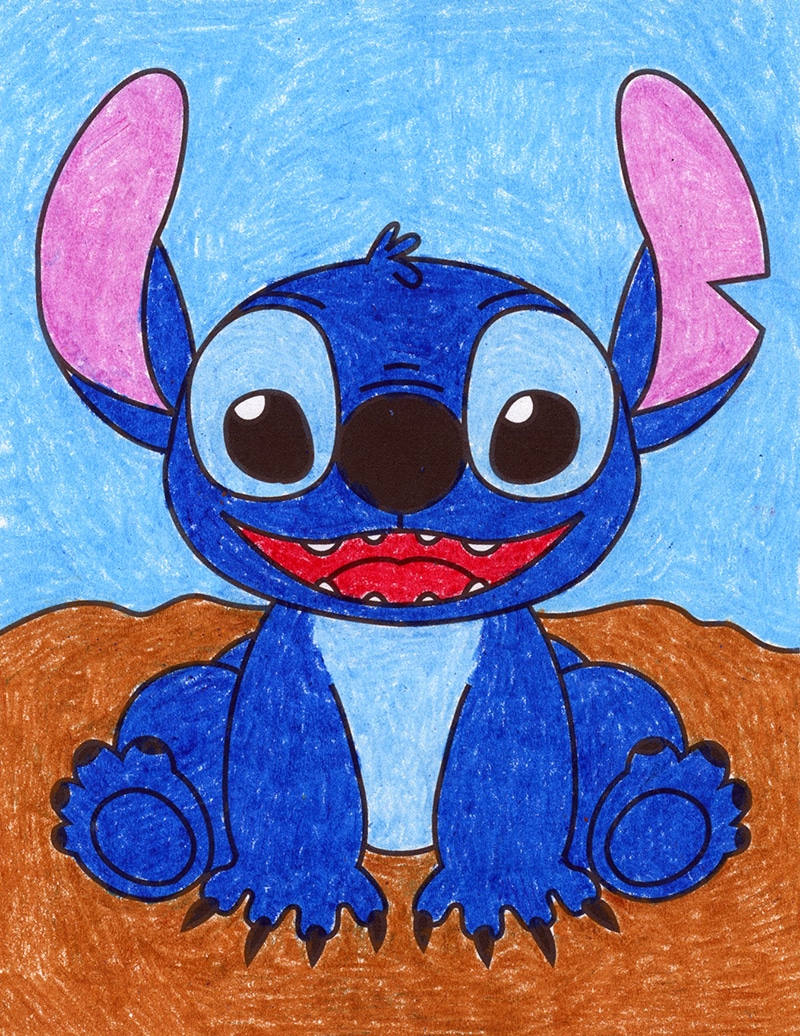
Once your lines are perfected and inked, it’s time for the most satisfying part: coloring! Let’s color to complete the picture. Stitch's color palette is relatively simple but highly effective: his signature blue body, with lighter blue or teal accents on his belly and inner ears, and pink for the inside of his ears and nose. His eyes are typically black with white highlights, giving them a glossy, lively appearance.
When coloring, consider the light source to add depth and dimension. Use lighter shades for areas hit by direct light and darker shades for shadows. This simple technique can make your Stitch drawing pop off the page. Lilo and Stitch coloring pages allow you to relive the tropical fun, and they are a great way to practice your coloring skills before tackling your masterpiece. You can print Lilo coloring sheets, a hibiscus drawing, cute drawings of Stitch, Angel, and Nani to experiment with different coloring techniques and palettes.
Beyond the Basics: Advanced Stitch Drawing Techniques & Ideas
Once you're comfortable with the basic Stitch drawing, the possibilities are endless. Bring the beloved character Stitch to life with our Stitch drawing ideas. Here are some ways to push your skills further:
- Dynamic Poses: Experiment with Stitch in action! Draw him jumping, running, or even performing his iconic hula dance. Consider how his limbs and body would stretch and compress in different movements.
- Expressions and Emotions: Go beyond his standard mischievous grin. Can you draw Stitch looking sad, angry, surprised, or thoughtful? Focus on how his eyes, eyebrows, and mouth change to convey these emotions.
- Interactions: Draw Stitch interacting with Lilo, holding a ukulele, or even playing with his favorite toy, Scrump. Adding other characters or objects helps tell a story within your drawing.
- Backgrounds: Place Stitch in his Hawaiian environment. Add palm trees, sandy beaches, or the interior of Lilo's house. This adds context and makes your drawing a complete scene.
- Stylization: Once you've mastered his traditional look, try drawing Stitch in different art styles. What would he look like as a chibi character? Or in a more realistic, perhaps slightly monstrous, interpretation?
- Digital Art: If you have access to a drawing tablet and software, explore digital painting techniques. This allows for easy corrections, layering, and a vast array of brushes and effects.
The key is continuous practice and observation. The more you draw Stitch, the more intuitive the process becomes, and the more freedom you'll have to experiment and inject your own artistic flair.
Resources for Aspiring Stitch Artists
The internet is a treasure trove of resources for learning how to draw. Want to find out how to draw Stitch? You'll find countless tutorials available. Many artists share their processes through video tutorials, which are incredibly helpful for visual learners. Search for "How to draw Stitch Disney | Stitch drawing easy cute" on platforms like YouTube, and you'll find numerous step-by-step guides.
Additionally, many websites offer printable versions of Stitch drawing tutorials, which are ideal for art teachers and homeschoolers looking to teach kids how to draw their own version of Lilo’s blue pal! These printable guides often break down the process into clear, numbered steps, making it easy to follow along at your own pace. Joining online art communities or forums can also provide valuable feedback and inspiration from fellow artists.
Common Pitfalls and How to Overcome Them in Stitch Drawing
Even with simple steps, drawing can present challenges. Here are a few common pitfalls when attempting a Stitch drawing and how to overcome them:
- Proportion Issues: Stitch's head can sometimes appear too large or too small for his body, or his limbs might seem out of place.
- Solution: Always start with light, basic shapes and compare their sizes to each other. Use your pencil as a measuring tool to gauge relative proportions. Step back frequently to look at the overall balance.
- Symmetry Challenges: Getting both sides of Stitch's face or body to match can be tricky.
- Solution: Rely heavily on those initial vertical and horizontal guidelines. Flip your paper over and hold it up to a light source to see if the drawing looks balanced in reverse – this often reveals asymmetry you missed.
- Lack of Expression: Sometimes, drawings can look flat or lifeless.
- Solution: Focus on Stitch's eyes and mouth. These are the primary conveyors of emotion. Study reference images of Stitch in various moods and try to replicate those subtle nuances.
- Over-detailing Too Soon: Getting bogged down in small details before the main structure is solid.
- Solution: Follow the "big shapes first" principle. Don't add fur texture or claws until you're completely satisfied with the overall outline and proportions.
- Impatience: Rushing through the steps can lead to frustration.
- Solution: Drawing is a process, not a race. Take breaks if you feel frustrated. Remember, every stroke is a learning opportunity. Enjoy the journey of creating your Stitch.
Remember, everyone makes mistakes, especially when learning. The key is to learn from them and keep practicing. Your dedication will pay off, and soon you'll be drawing Stitch with confidence and flair.
Conclusion
Drawing Stitch, the beloved character from Disney's "Lilo & Stitch," is a wonderfully rewarding artistic endeavor that is accessible to everyone. From understanding his unique anatomy built on basic shapes to adding those crucial details that bring his personality to life, we've explored the journey of creating your very own Stitch drawing. We hope you followed along with us, armed with nothing more than something to draw with, paper, and coloring supplies, and discovered how simple and enjoyable the process can be.
Whether you're a beginner seeking an easy entry into character art or an experienced artist looking for a fun new subject, Stitch offers endless possibilities for creative expression. Don't be afraid to experiment with different poses, expressions, and coloring techniques. The more you practice, the more confident and skilled you'll become. So, pick up your pencils, let your creativity flow, and bring Experiment 626 to life on your canvas. Share your Stitch creations with us in the comments below, or explore more of our drawing tutorials to continue your artistic adventure!

How to Draw Stitch from Lilo and Stitch - Really Easy Drawing Tutorial
How To Draw Stitch From Lilo And Stitch Step By Step
Learn How to Draw Stitch from Lilo and Stitch (Lilo & Stitch) Step by
